


Inspiring Light Bulb Photo Manipulation Photoshop Tutorial
Resources
- Light Bulb, Holder and Sunset- Pelleron-Art
- Desert- night-fate stock
- Crack - nighty-stock
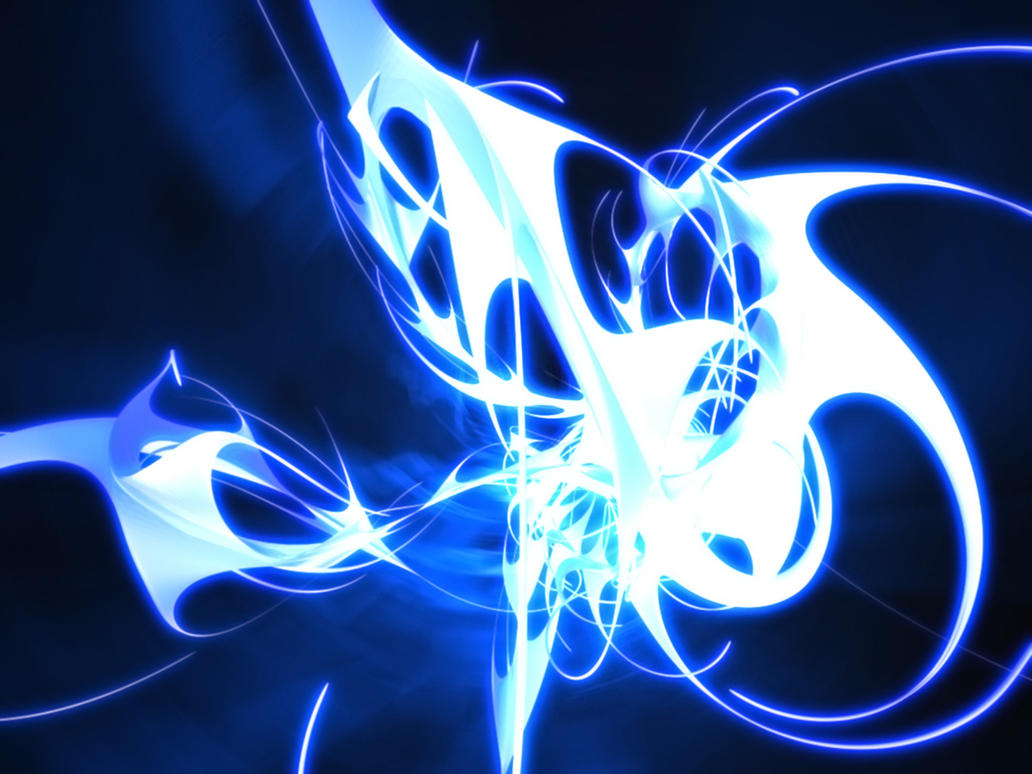
- Fractal - PinkMonkeyLove
- Flowers and leaves - in the following text
Step 1 - Preparing the Document
Create a new document in Photoshop. To do that go to File > New... or press Ctrl + N. Set the value Width on 600 pixels and Height on 400 pixels. Press OK.

Step 2 - Cutting Out the Sky From the Ground
In this step you´re going to cut out the sky from the ground picture. You can do it very easily thanks to Channels. To do that click on the palette Channels. If you don´t see it go to Window > Chanels. On the palette you can see RGB, Red, Green and Blue channel. Right click on the Blue channel and duplicate it.TIP: If you cut out something with Channels, always duplicate the channel where is the biggest contrast between the object you want to cut out and the rest of the image.
Let make only the Blue copy channel visible and the rest invisible.


Step 3 - Adjusting the Mountain
If you take a look on the picture above you can probably see that the mountains on the horizon should be less blue and more orange because of the sun nearby. You´ll fix it in this step.Add new adjustment layer Selective Color on the top of your layers (To do that click on the button "Create a new fill or adjustment layer" which can be found on the bottom part of the palette Layers. If you don´t see this palette go to Window > Palette or simply press F7 on your keyboard.)

Set the adjustment layer Selective Color in the same way as you can see on the following picture.


Grab the Brush Tool (B), select some soft round brush, set Master Diameter on about 20 pixels and Opacity on 30%. pick some color similar to colors of the sky and gently paint over the parts of mountain which stay too blue. Once you´re finished your image should look like the one bellow.

Step 4 - Reflection of Sun
If you look at some sunset photos you may notice that the sun creates "aura" on the objects behind which it shines. You will create the aura in this step.TIP: You can take a look at two examples of this aura - photography "Sunset" by satomy79 on deviantart and painting "Cretaceous Sunset" by kerembeyit.
Make GROUND invisible for a while (click on the small eye icon).


Step 5 - Adding the Light Bulb
It's time to add the light bulb.Download the picture of light bulb from the link I've provided on the beginning of the tutorial and drag it into the manipulation. Place the layer on the top of all layers and name it LIGHT BULB. Press Ctrl + T and resize it on proper size.
Tip: There is plenty of ways how to blend glass. You can blend it with the help of Channels (it's quite similar as what you did in the step 2) or with different blending modes - e.g. if you have photo of the glass on the black background the easiest way how to blend it is to change the Blending Mode on Screen. It makes the black background invisible but the glass stays visible. You should try it!
But I´d like to show you another way to learn you as much as possible in this tutorial.
The way how you´ll do it is pretty simple. Make all layers except LIGHT BULB invisible (similarly as in previous step). Then go to Select > Color Range... and with the eye dropper click on some white part of the light bulb. The Color Range makes selection based on the color you´ve selected.


Step 6 - Adjusting the Light Bulb
The glass should have more orange tones because the light on the scene is very warm because of the sunset. To fix it add new adjustment layer Photo Filter above the layer LIGHT BULB. Choose #BB6F56 reddish color and higher the Density on 60%.Create clipping mask from the layer.
Step 7 - Adding the Holder
This will be really quick step. Open the picture of the holder in Photoshop. Cut out the background and drag it into the manipulation. Name the layer HOLDER and place it under the LIGHT BULB. Press Ctrl + T and resize it on proper size. Press Enter.
Step 8 - Adjusting the Holder
As you may see on the picture above the holder is too bright and should be more orange. You´ll fix it in this step. To increase the contrast add new adjustment layer Levels above the HOLDER and set the Input Levels on 125; 1,22; 226. Create clipping mask from this layer.

Step 9 - Adding the Shadow Under the Bulb
To make the light bulb looks like it is actually standing on the ground you need to add shadow under it. Create a new layer under the layer HOLDER and name it SHADOW UNDER THE BULB. Grab the Eyedropper Tool (I) and pick some dark brown color from the ground. Then grab the Brush Tool (B) and paint thin line under the light bulb. On the following picture you can see how the shadow could look. (I added the white background so can see the shadow better.)
In nature you will find very few pure black things - more often they are dark tones of different colors but your brain percieve them as black. Your pictures will look much more realistic if you don't use black.
Step 10 - Blurred Background Behind the Bulb
The background behind the bulb should look little blury because of the glass in front. You´ll do it in this step. Click on the layer GROUND. Grab the Lasso Tool (L) and select the area behind the bulb. Press Ctrl + C to copy the selection and paste it under the HOLDER. Name this new layer e.g. BLURRED BACKGROUND. Go to Filter > Blur > Gaussian Blur... and set the value Radius on 2,0 pixels. Press OK.
Step 11 - Ading the Flowers
Now it´s time to add flowers and leaves. It´s pretty simple step but little time consuming. Cut out the background of the flower if it´s necessary, drag it into the manipulation, resize it properly and put it on the right place. Do the same process with all flowers and leaves. Below you can see the video showing how I added the flowers. And on the following picture there is shown which flower is from which stock.- A - livinius stock
- B - sourcow stock
- C - grannysatticstock
- D - sammykaye1sStamps
- E - MaureenOlder
- F - AJK-Original-Stock
- G - Tempestazure

Step 12 - Glass In Front of the Flowers
Right now the flowers look like they are in front of the light bulb, not inside. You'll fix it in this step. The way how to do it is quite easy. Right click on the layer LIGHT BULB and select option Duplicate Layer. Name this new layer e.g. BULB IN FRONT and place it on the top of all layers. Lower the opacity of this layer on 40%.
Step 13 - Adding Shadows Under the Flowers
Now it's time to add shadows under the flowers to make them looking that they're not levitating but standing on the ground.TIP: Always if you add some new object to your manipulation don't forget to think about shadows which the object automatically creates. Every object (except those who are flying) should have thin line of shadow between itself and the object on which it's standing.
Create a new layer under the layers with flowers and name it e.g. SHADOWS UNDER FLOWERS. Grab the Eye Dropper Tool (I) and select some dark brown color again. Then grab the Brush Tool (B), select some soft round brush and set the Master Diameter on 25 px. Lower the Opacity of the brush on 50%.
Now start painting shadows. Bellow you can see how the flowers look with and without the shadows. I change the background on light green color to you can see the result better.

Step 14 - Adding a Crack
Select one of the pictures with crack mentioned in the beginning of the tutorial (I selected the one named "01.jpg") and drag it into your manipulation. Place the layer on the top of all layers and name it CRACK.Press Ctrl + T and resize it on proper size. You can also rotate it a little to it will fit better on the light bulb. Look at the following picture to get the inspiration.

Add vector mask to this layer. Grab the Brush Tool (B), pick black color and paint over the areas of the crack which should dissapear to be properly blended. On the picture below you can see how the crack should look so far.

Step 15 - Warp the Crack
There are still two things I don't like about the crack. First the crack is quite bad visible and deserves bigger contrast. Second the crack doesn't copy the shape of the bulb. The bulb is rounded but the crack is too flat.To increase the contrast of the crack go to Image > Adjustments > Levels... or press Ctrl + L and set the Input Levels on 0; 1,00; 200.

Once you're satisfied with the shape of the grid press Enter on your keyboard to apply the warp.

Step 16 - Changing the Light
In this step you will change the light scene to gain more focus on the focal point of the manipulation, which is the light bulb.Create a new layer on the top of all layers and name it LIGHT CHANGE. Grab the Brush Tool (B), select some big soft round brush and pick some dark violet color from the sky. Lower the opacity of the brush on about 30%. Paint a decent vignette around the image.


Much better isn't it?

Step 17 - Adding the Fractal
In this step you're going to add the image of fractal to create the effect that the bulb is shining or glowing. Open the picture of fractal and drag it into the manipulation. Place the layer on the top of the layers and name it FRACTAL. To blend the layer properly you need to change the Blending Mode again. This time on Screen. It makes that the black color dissapear.

Step 18 - Analysis of the Light Scene
Now it's time to focus more on building interesting light scene. So far the image looks bit dull because there is quite low contrast between lights and shadows and light itself is quite uninteresting. You'll change it in this and some of the folowing steps.To be able better imagine how the whole light scene should look like I took a photo with light bulb and the lamp to imitate the scene on the maipulation. Below you can see the photo.

- Lens Flare - it gives the picture sort of "movie feel"
- Yellow lines around the edges
- Lighter part on the light bulb where the sun is reflected
- Shadows from the holder
Step 19: Adding Lens Flare
The first item from the "lighting list" is to add the lens flare. I encyrcled it on the example photo. You can see it below.

To blend the layer properly change the Blending Mode on Screen. According to me the brightest spot of the flare is too bright and makes the eyes hurt. To make it softer add new vector mask to this layer. Grab the Brush Tool (B), pick black color and lower the Opacity on 30%. Gently paint over that bright spot.

Step 20 - Yellow Lines Around the Edges
Second thing on the list is adding the yellow lines. I circled them on the example image again so you can see better what you will create in this step.

Step 21 - Aura Around the Light Bulb
You will add the rest of the thing from the list little later. Now lets focus on something different. To make the light bulb looks like it is really shining it should have decent aura around. You'll create it in this step. Add a new layer on the top of the layers and name it AURA. Grab the Brush Tool (B), pick some very light yellow or orange color and lower the opacity of the brush on 20%. Set the Master Diameter on 60 pixels. Paint white stroke around the light bulb, not around the holder. Below you can see how the image looks with and without this step.
Step 22 - Reflection to the Light Bulb
The light bulb and the flowers inside should have bit more orange tones. To add them grab the Lasso Tool (L) and select part of the sky. Make the shape of the selection similar as the shape of the bulb.
Grab the Move Tool (V) and move the layer above the light bulb.
Change the Blending Mode on Soft Light and lower the opacity on 50%.
To blend this layer with the rest of the image even nicely add vector mask to this layer, grab the Brush Tool (B), select some soft round brush, pick black color, lower the opacity of the brush on about 50% and over the edges of the layer to blend it.

Continue to Part 2